She was stumped.
It was a writer's slump, ya' might say.While working on a creating writing project, my daughter's word-well had run dry. She needed some inspiration. Some direction. Some focus.
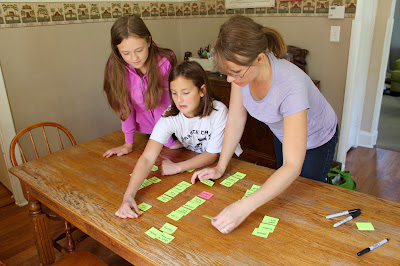
So, I sat her down (along with a few of her besties) and taught her how to make a mind map.
If you're not familiar with this simple writer's hack, a mind map is tool used for brainstorming and organizing your ideas about a particular topic or story line. It works great for both creative and expository writing styles.
Here's the quick version of how it works.
What you need
- several stacks of sticky notes in a variety of colors (The 1 inch square ones work best for me.)
- a pen
- a large, uncluttered surface like a table or desk
What you do:
Begin by writing your topic on a sticky note and placing it in the center of your work area. Then, using a different colored stack of stickies, begin writing down anything and everything that comes to your mind regarding that topic. No thought is a bad thought. As soon as something pops into your head, write it down. Be sure to only write ONE thought on each sticky note.
Randomly place these "thought" notes around the topic note in the center.
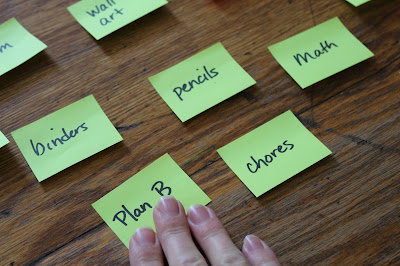
(For my demonstration on how to make a mind map, I chose the topic of my blog...homeschooling. The girls helped me brainstorm ideas about how a mom might organize her homeschool day. I wrote "homeschool organization" on a sticky note and stuck it in the center of the dining room table. We, then, began to "brain dump" all of our ideas onto yellow notes.)
Once you've purged your mind of everything you can possibly think of in light of your chosen topic, begin to group your sticky notes together into common themes or sub-topics.
Rearrange the sticky notes so that similar notes are grouped together. Each note in a group should have equal value. If you notice that one note seems more or less important than the rest, perhaps it should be made into its own sub-topic or jogged underneath one of the other notes creating a supporting detail.
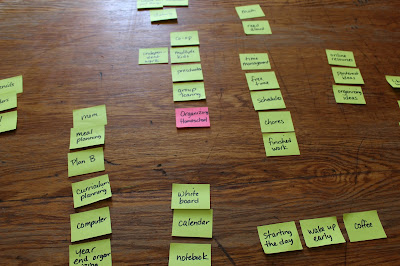
(For our "organizing your homeschool day" example, we grouped the yellow notes into seven or eight sub-topics which included things such as time management hacks, planning resources, space organization, etc.)
Determine exact sub-topic titles and write these on a different colored sticky note. At this point, you should begin to see a basic map or outline forming.
Scan the entire work space to see which sub-topics are too large and might need to be divided or broken down even further OR which ones are too small and might need to be further brainstormed. Don't be too concerned with the grammar of the notes at this point. One sticky note in the group might be a verb while the rest are all nouns. That's just fine. There will be time to polish it all up later.
(We grouped the following yellow sticky notes together because they possessed some similarities: curriculum planning, computer programs, Plan B, meal planning, year-end organizing. We decided to title this group "planning resources" since they all had something to do with planning and the resources that one might use. We wrote that on a blue sticky note and put it at the top of the yellow ones.)
Continue to mind map each individual sub-topic to add more supporting details to your plan.
(In our "planning resources" sub-category, we decided to add some supporting details to the main point "meal planning." These details were written on hot pink notes and included the following: grocery list, freezer meals, kid's cooking, and grocery shopping plan.)
Once you feel like you've purged every possible detail from you brain, you begin to write your mind map down in outline form reworking some of the grammar to make the points parallel and in proper outline form.
Traditionally, students have always been encouraged to begin the writing process by creating a linear outline. But, these black-and-white plans don't always inspire every writer...especially the reluctant ones. The 2-dimensional outlining process can be much more successful once the ideas have been manipulated in a 3-dimensional way. The fast-paced and kinesthetic nature of a mind map can get the creative juices flowing and help to organize the often messy process of crafting words.


Brilliant!! I have never seen this before and wish I had.. Thanks for teaching me something new.. vicki
ReplyDeleteBrilliant!! I have never seen this before and wish I had.. Thanks for teaching me something new.. vicki
ReplyDeleteLove this!
ReplyDeleteThanks!
DeleteWow! Can't believe I've never used mind maps before. I think I'm gonna use to help me with homeschool planning/scheduling. Thanks!
ReplyDeleteI have been using this for a couple years and didn't know it had a name! It's such a helpful method for so many things.
ReplyDelete